The Perez household has been celebrating all day long.
First, I can now say with confidence that James is officially potty trained. The entire process, which included bouts of starting and stopping, was a long and arduous one. My husband and I learned in recent weeks, based on James’ advances, that he was simply not ready before, until the turn of the year. Once he was ready it was literally like a switch being turned on. He finally got it.
In fact, just this morning he went downstairs to the potty all by himself while I was in the bathroom upstairs. As I was washing my hands I heard his Thomas the Train potty making all the bells and whistles, which is what happens when the potty gets filled with pee or poop. I ran down the stairs, SO excited and proud. Ahhh, we are super pumped and relieved. Now, we continue with Lucy, who has been inspired lately by her brother’s successes! I’ll need to remind myself to read my words above when we work through this process again.
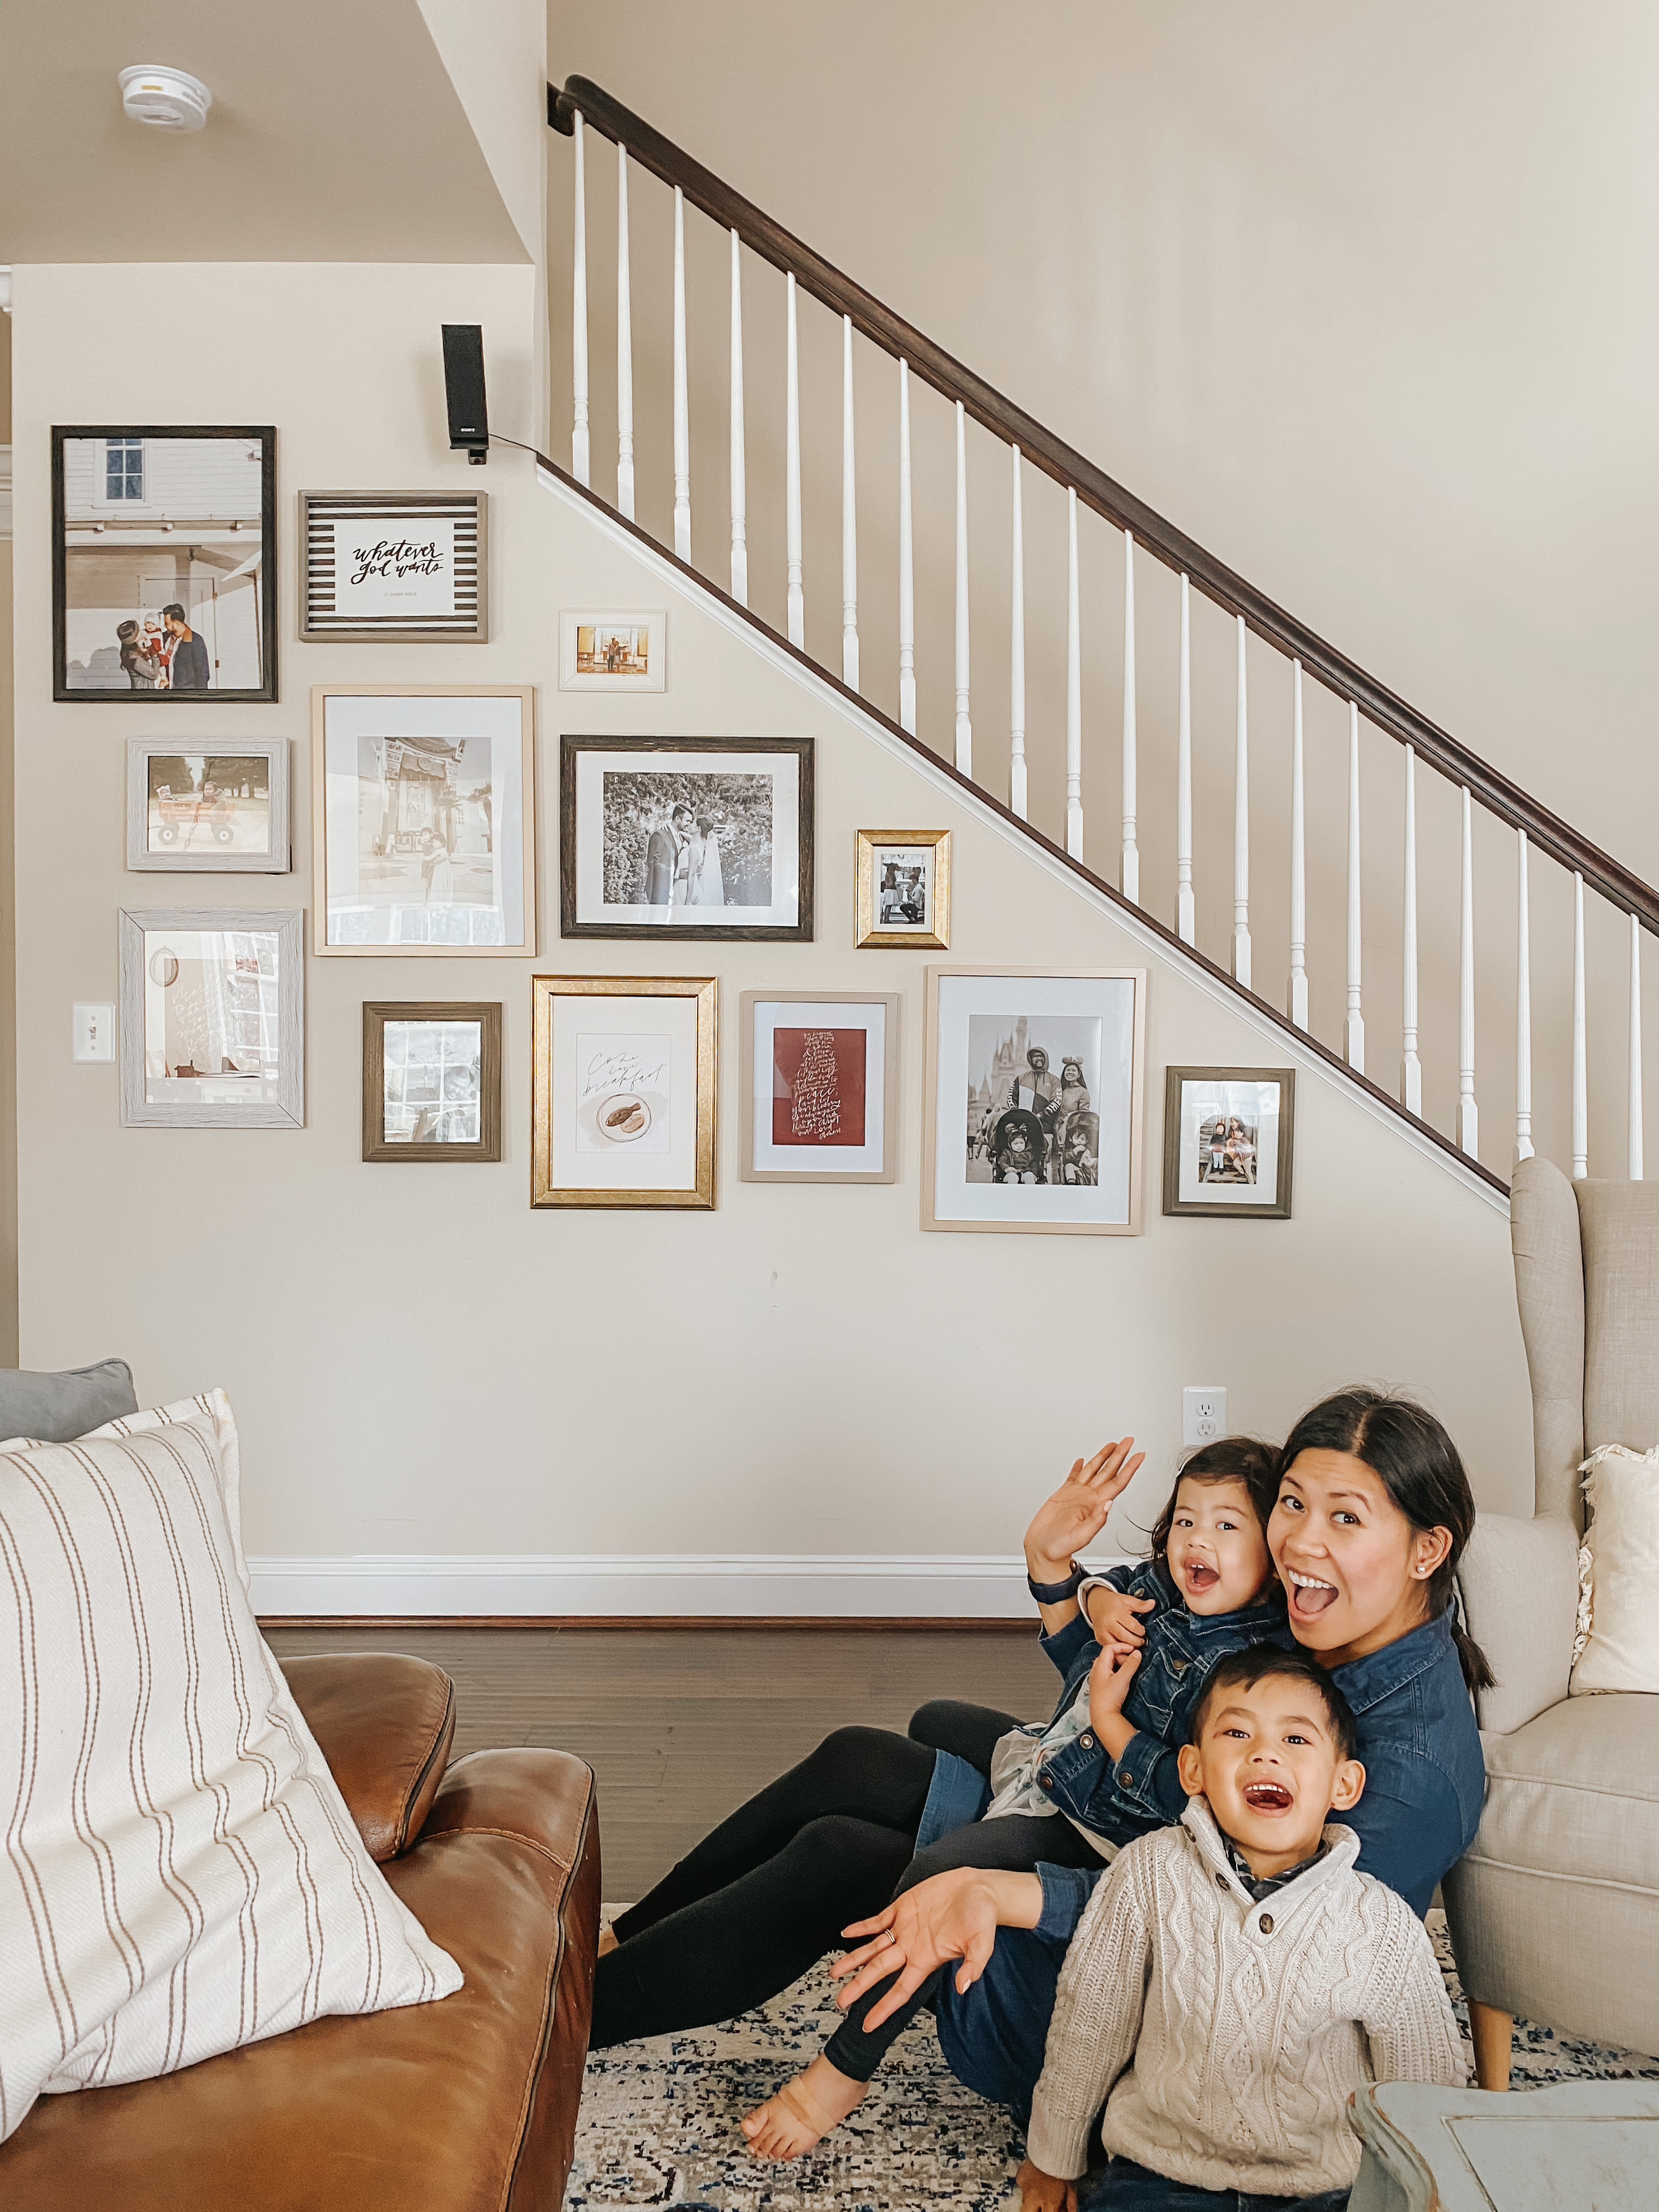
And two, we finally tackled our angled gallery wall, which is likely why you’re really here. ;) If this is your first time, HI & WELCOME!
For some time, arranging a gallery wall for me was a daunting task. I’m certain that professional framing services (i.e. Framebridge) make this process a piece of cake & is well worth the money and experience, but for us personally they are also way over our budget. Plus I’m typically the one that prefers the DIY path anyway, even if it takes forever. It’s been over two years since we first moved into our home, and so I’m glad it finally took a Walgreens Photo Print & Poster Sale (70% off) PLUS an A.C. Moore’s out-of-business sale (50% off frames) to finally make the plunge and just do it already. I’m happy we waited because we purchased four additional large frames for a steal.
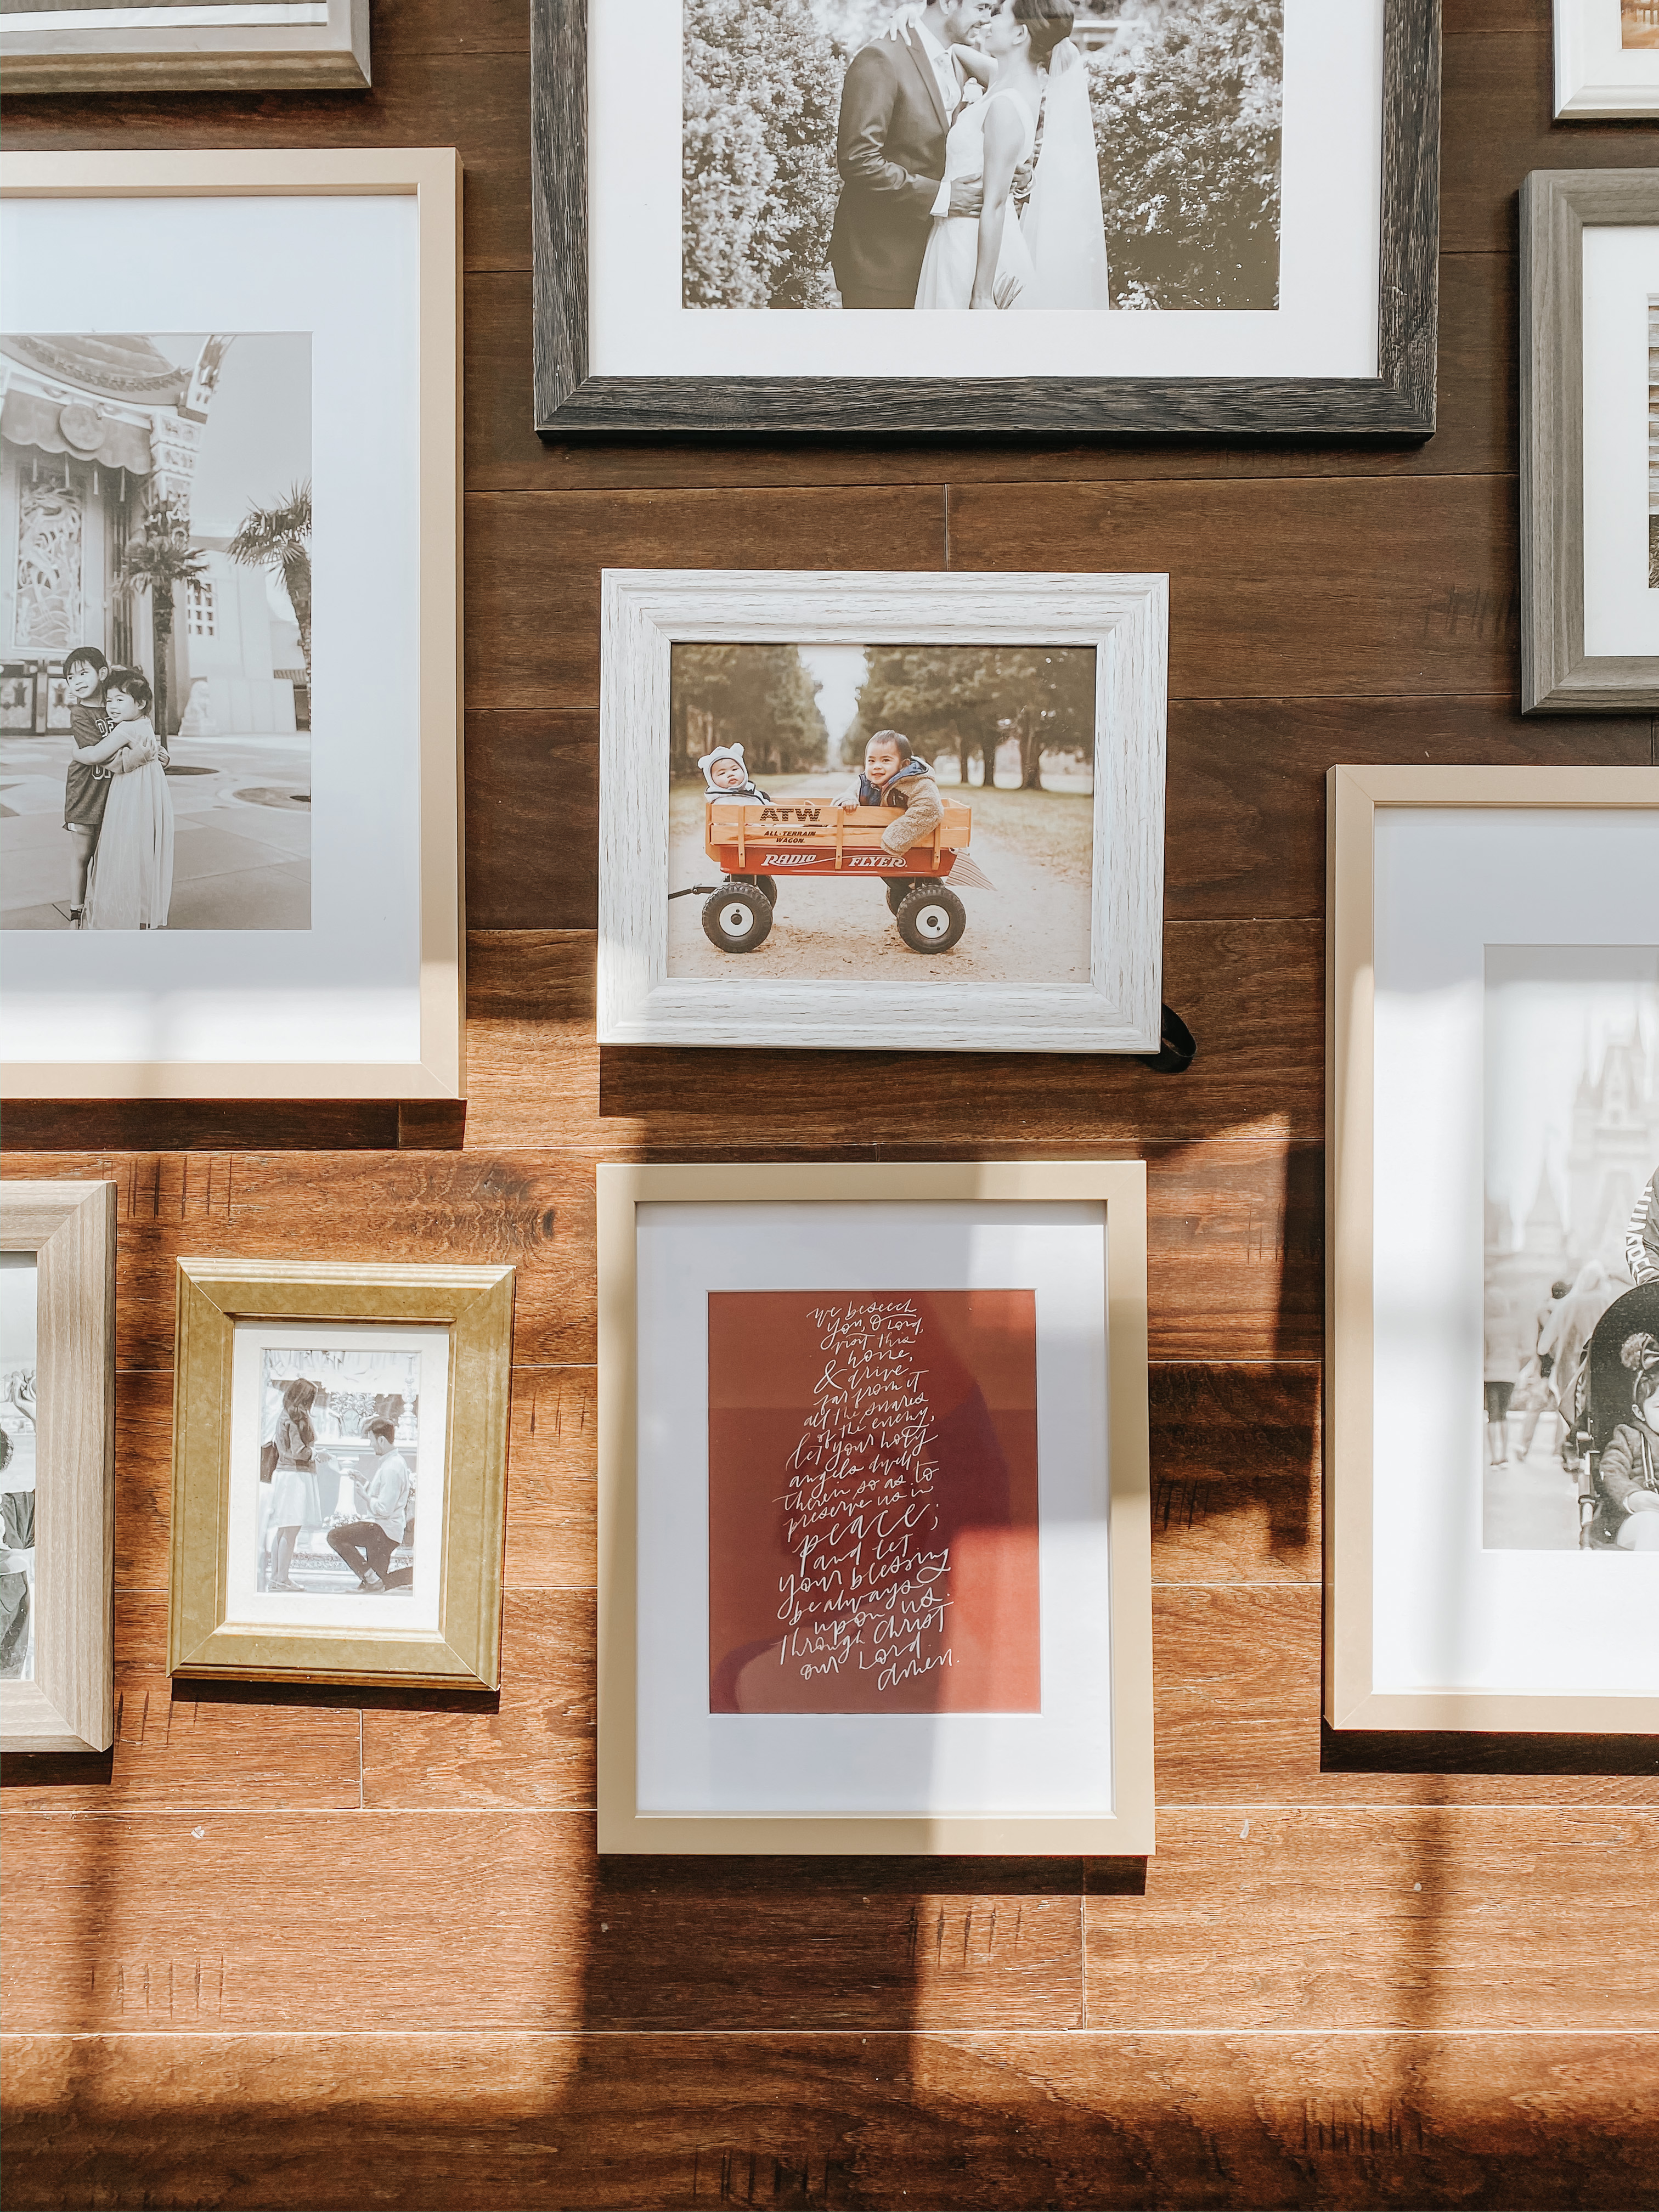
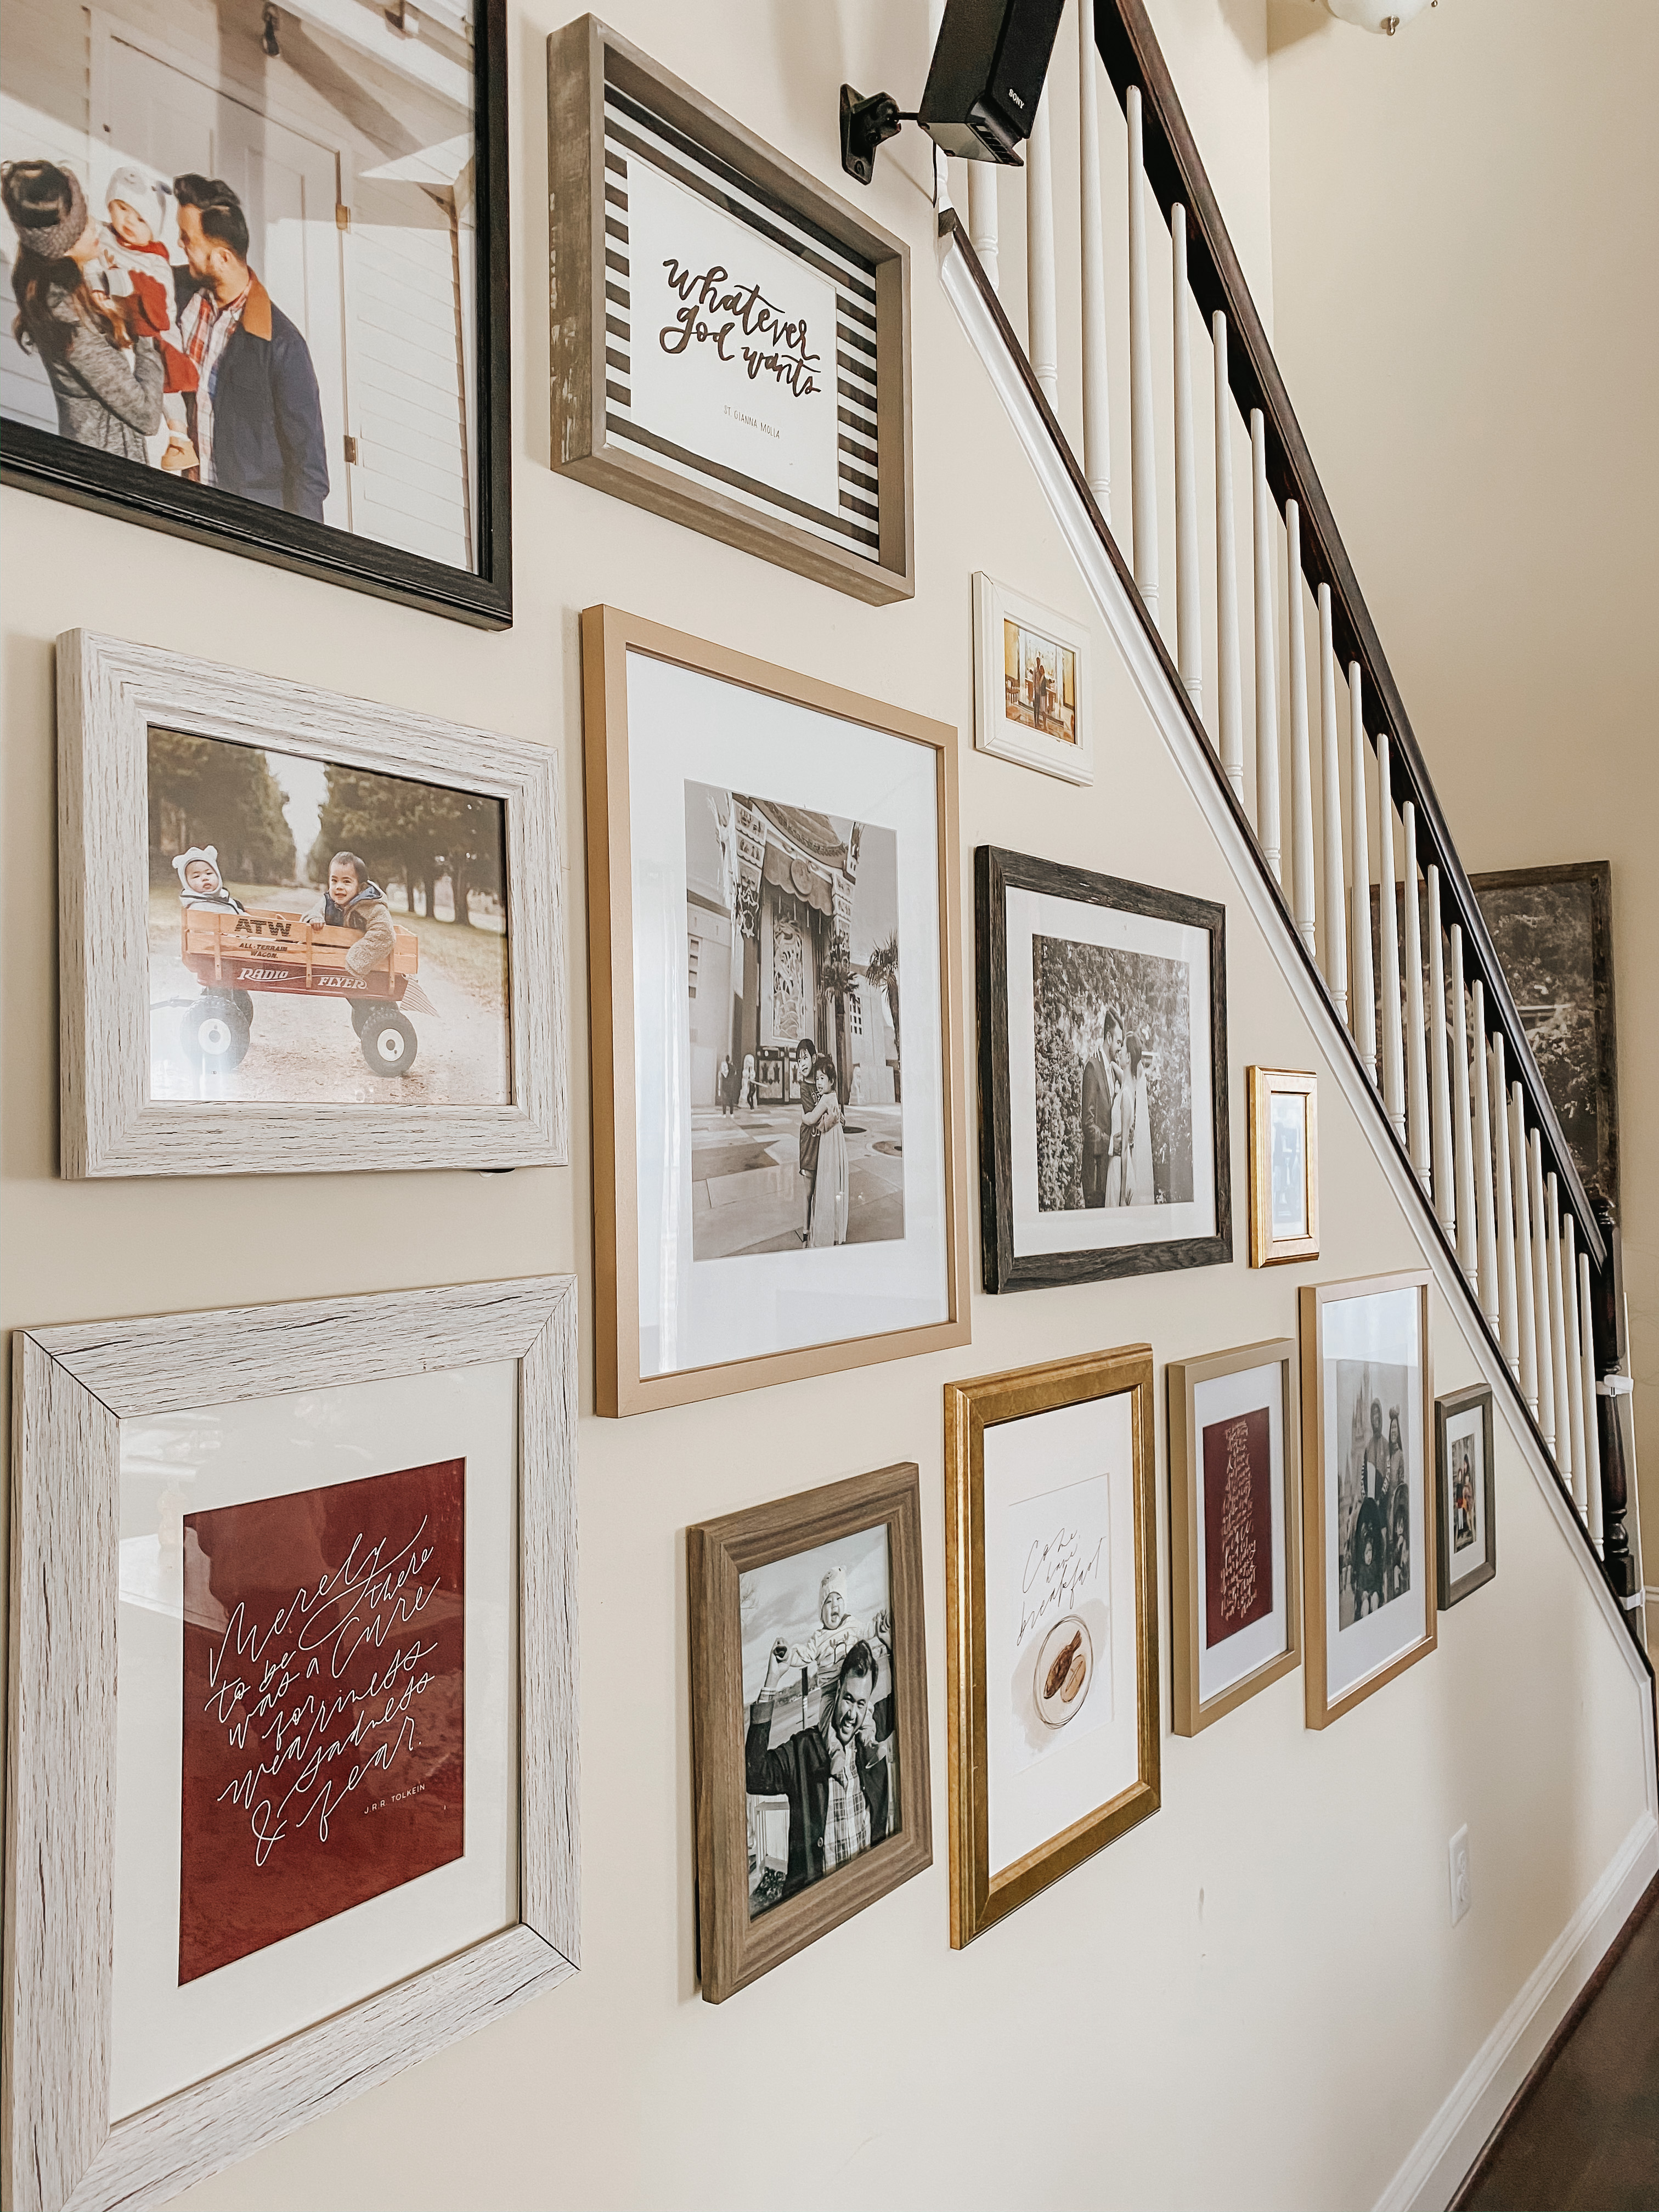
If you’re wondering first what kinds of frames to purchase, that’s entirely up to your preference. The new frames were in addition to the other frame types we have already collected through the years, and the colors were drawn from other colors & textures already present in our family room. We went with the barnwood (distressed natural + white), gold, and black combo.
Here’s a simple breakdown of our process:
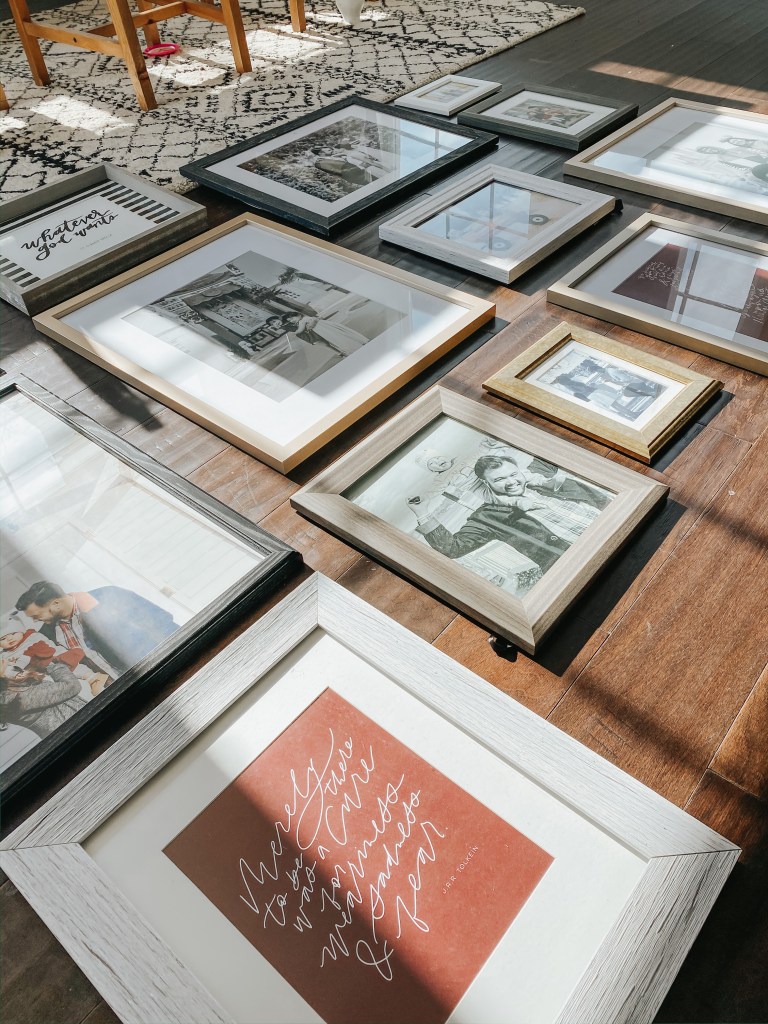
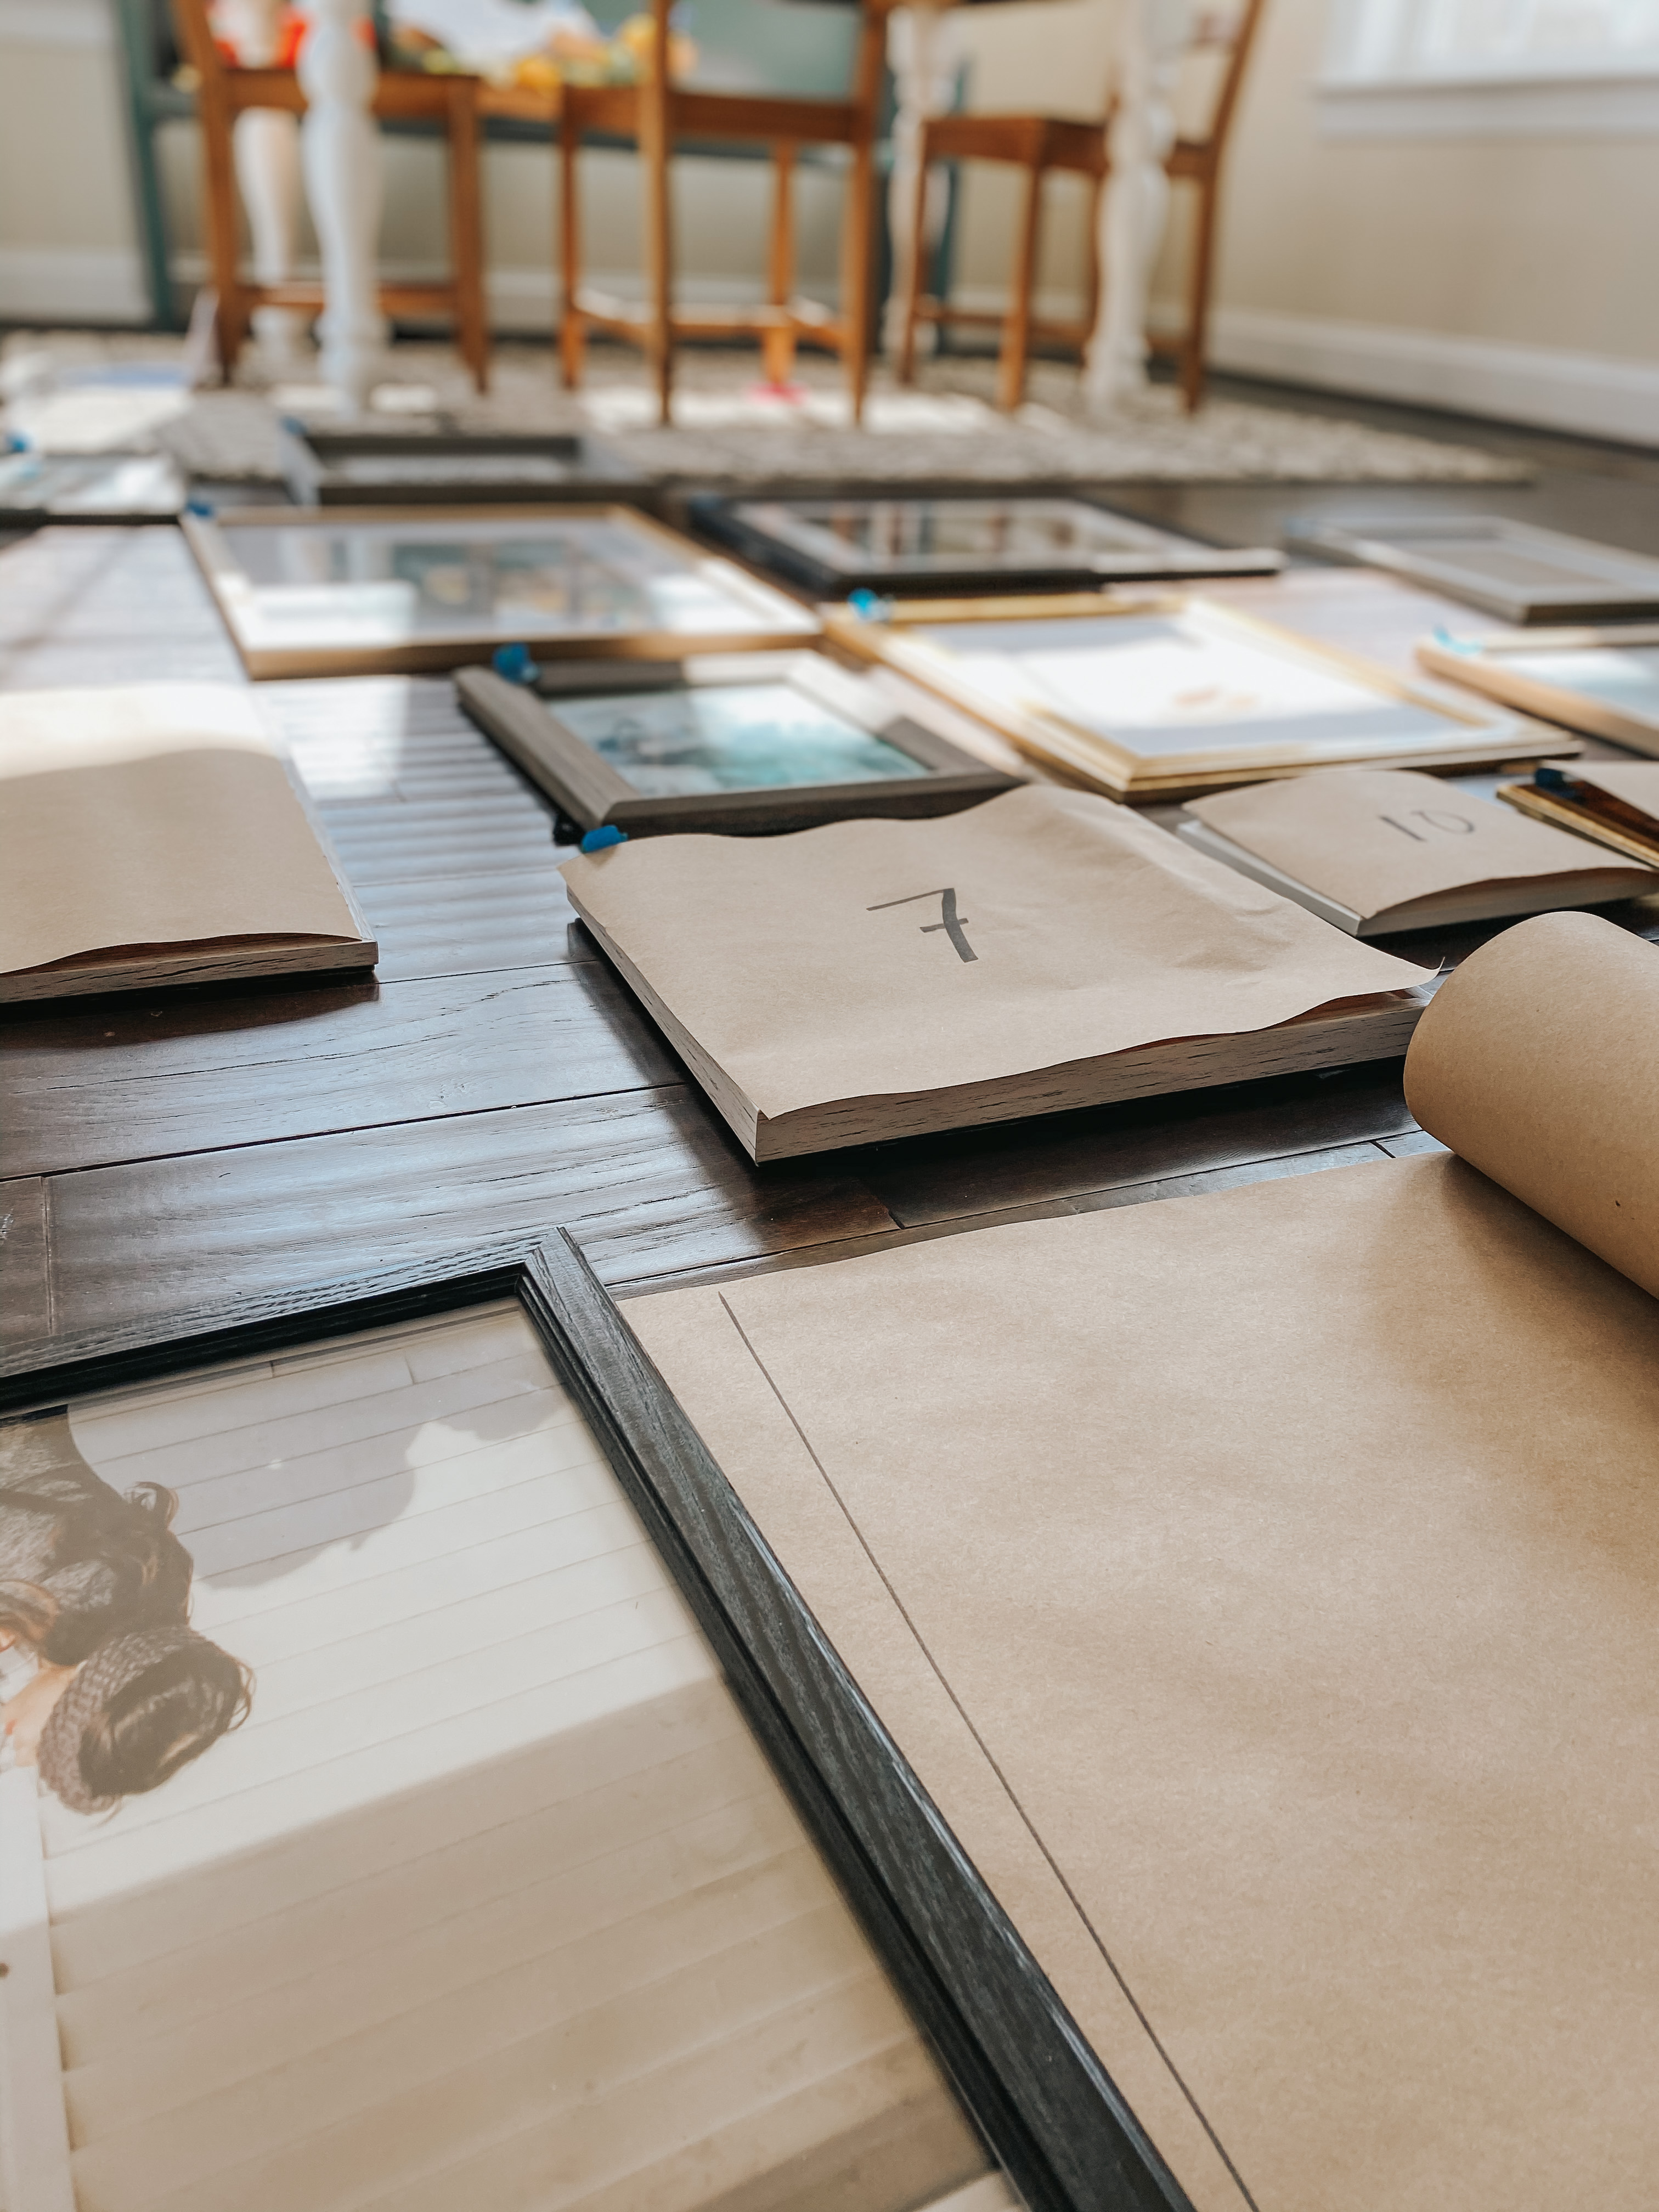
- On your floor, lay out all the frames that you will be using for the gallery wall. When shuffling the frames around, remember to keep the dimension and shape of the wall in mind. So in our case, I kept in mind the angle since the gallery wall location was under the stairs.
- As far as configuring the frames, play with the sizes and colors so that they are spread evenly throughout. The unity of the similar colors and textures tie everything together in the end, so arranging different dimensions will be ideal for creating movement and breaking the repetition of the 16×20 frames or 11×14, for example. Again, because of the angled wall, I wanted the frames to imitate the stairs so that’s how I arranged the top frames from left to right.
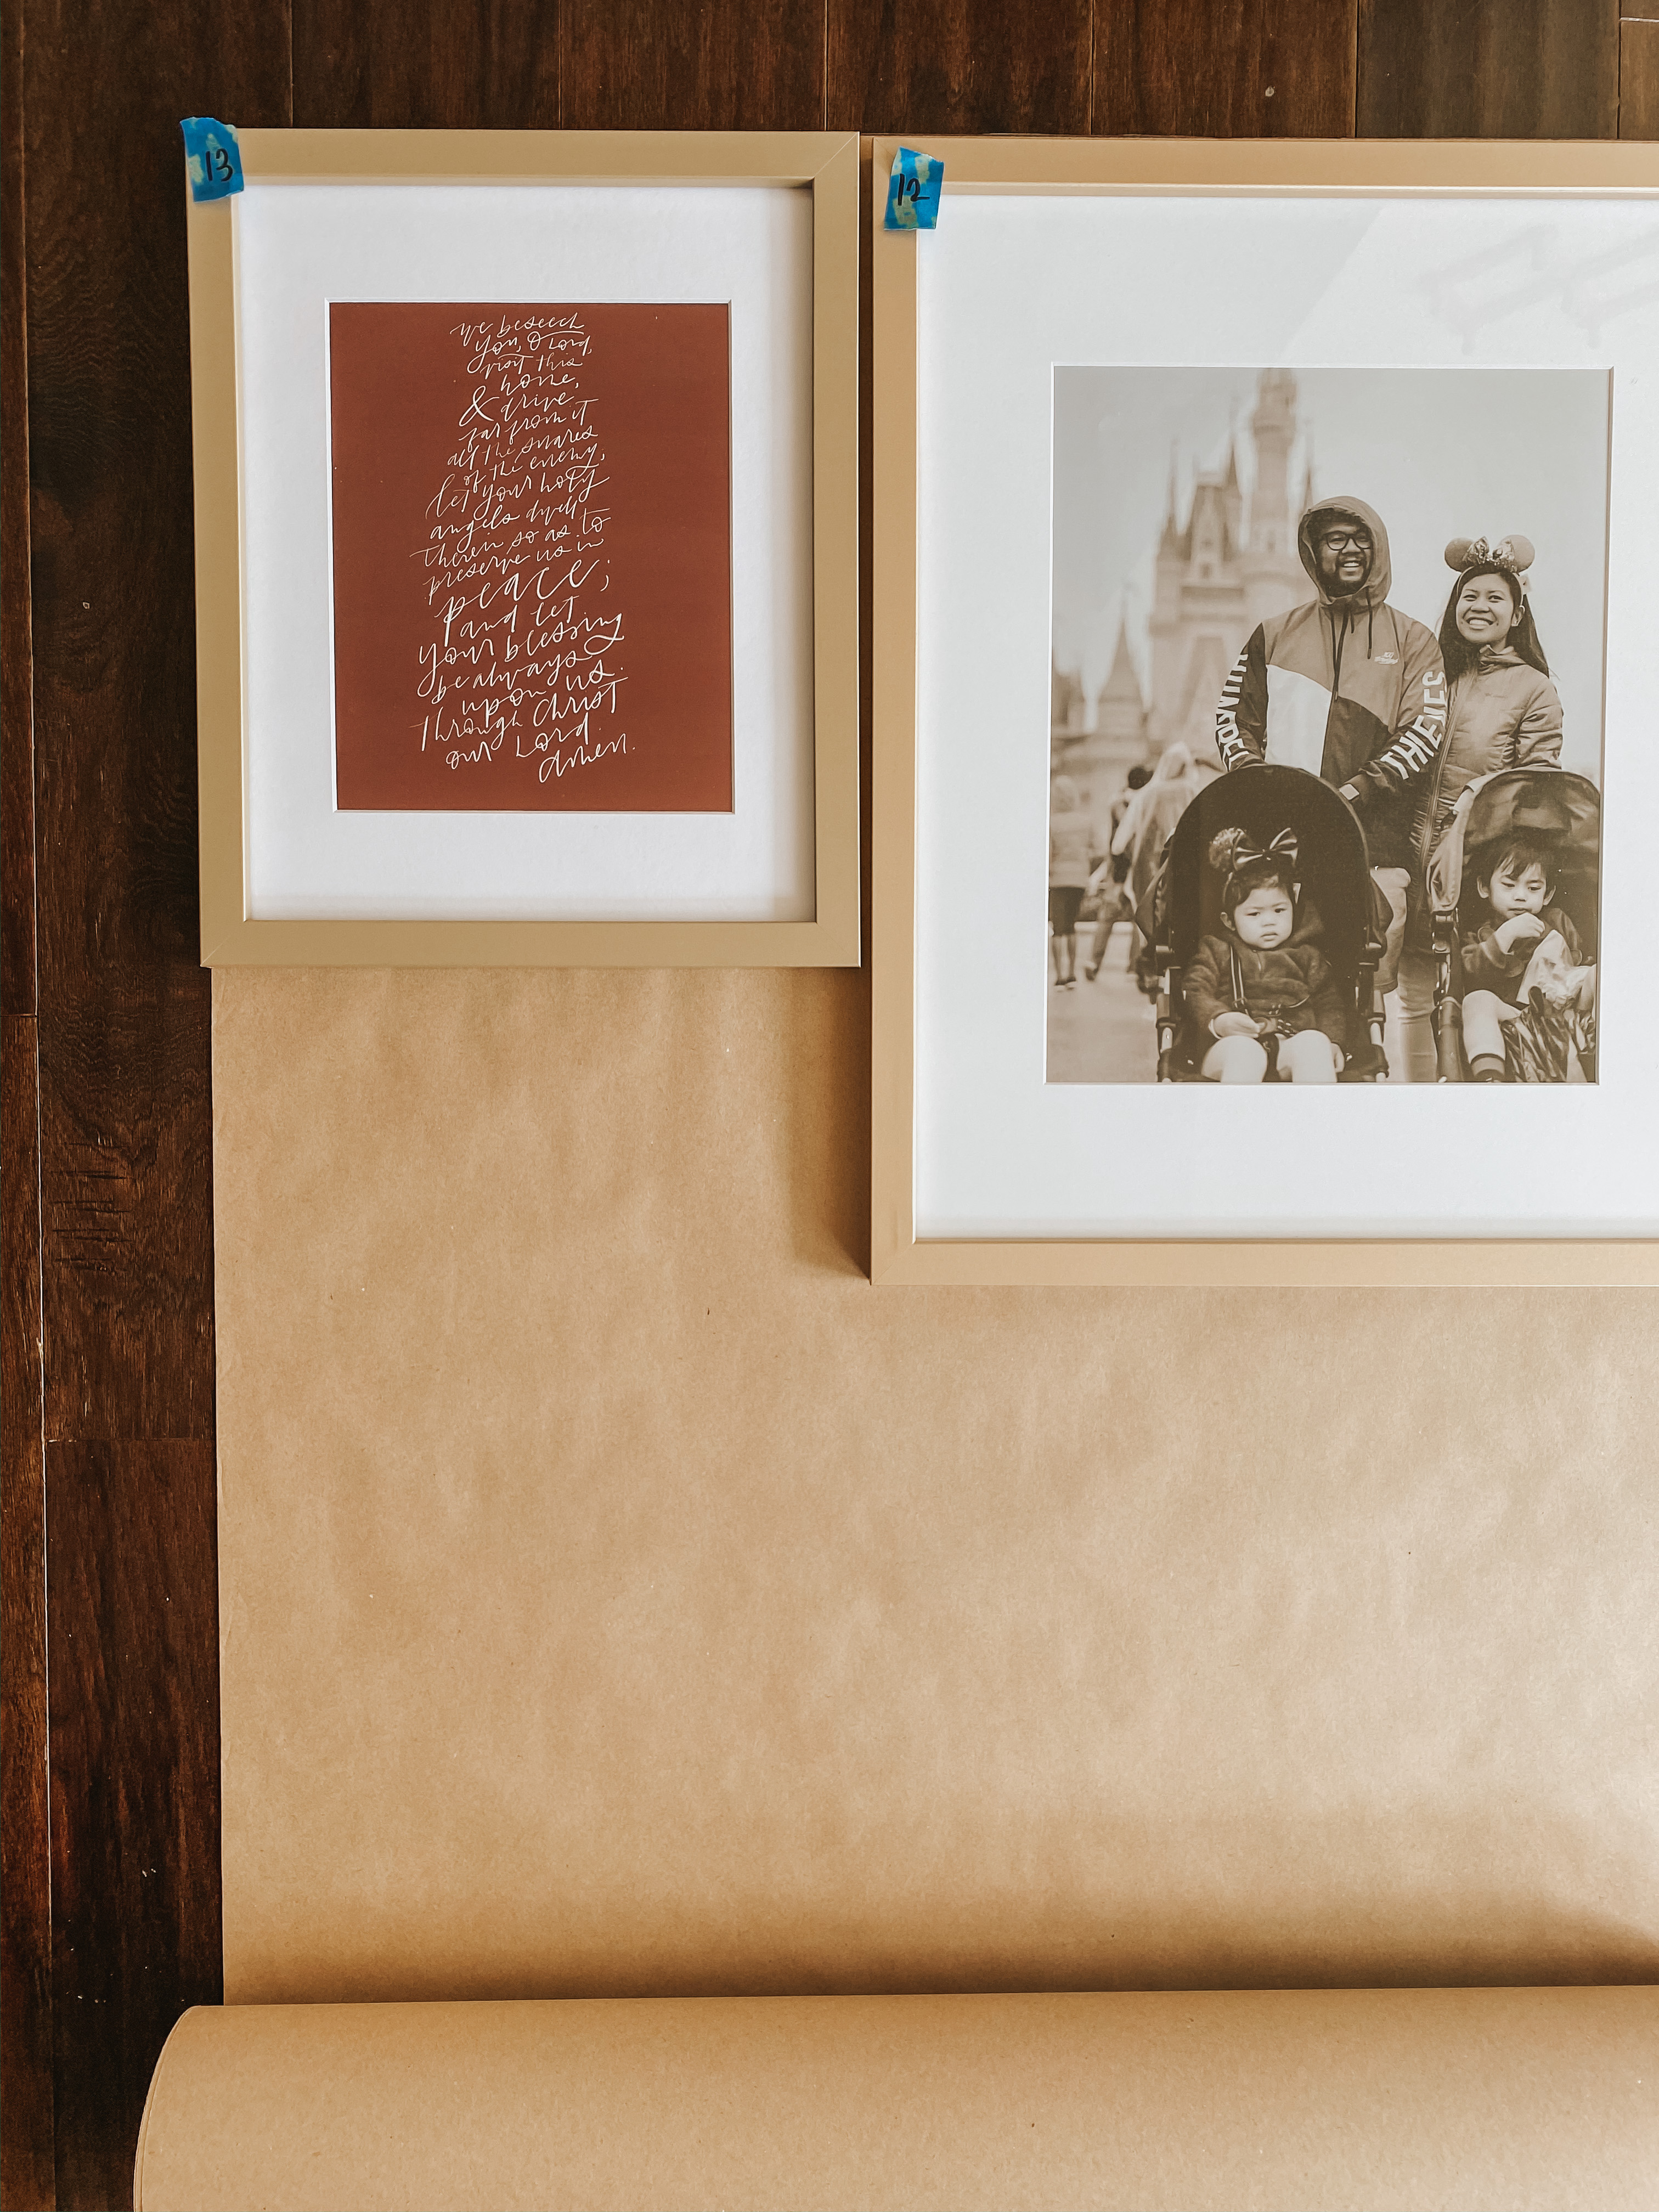
- Next, use something to trace the outline of each frame. I used our good ol’ roll of kraft paper. This creates a much easier experience when determining the configuration once it’s on the wall. I made sure to number the traced paper and the frame using painter’s tape. Since Jon would be the one to hang up the frames, this effort was to ensure accuracy for hanging and to make this as easy as possible with the corresponding numbers, especially in case he was unable to finish while I was around. (Low waste tip: Squeeze in as many frames onto the paper as evenly as possible for very little scraps from tracing & cutting. By the end of this project I barely had a handful of paper strips, and I plan on reusing the traced paper for hand-lettering drafts or for wrapping small gift boxes.)
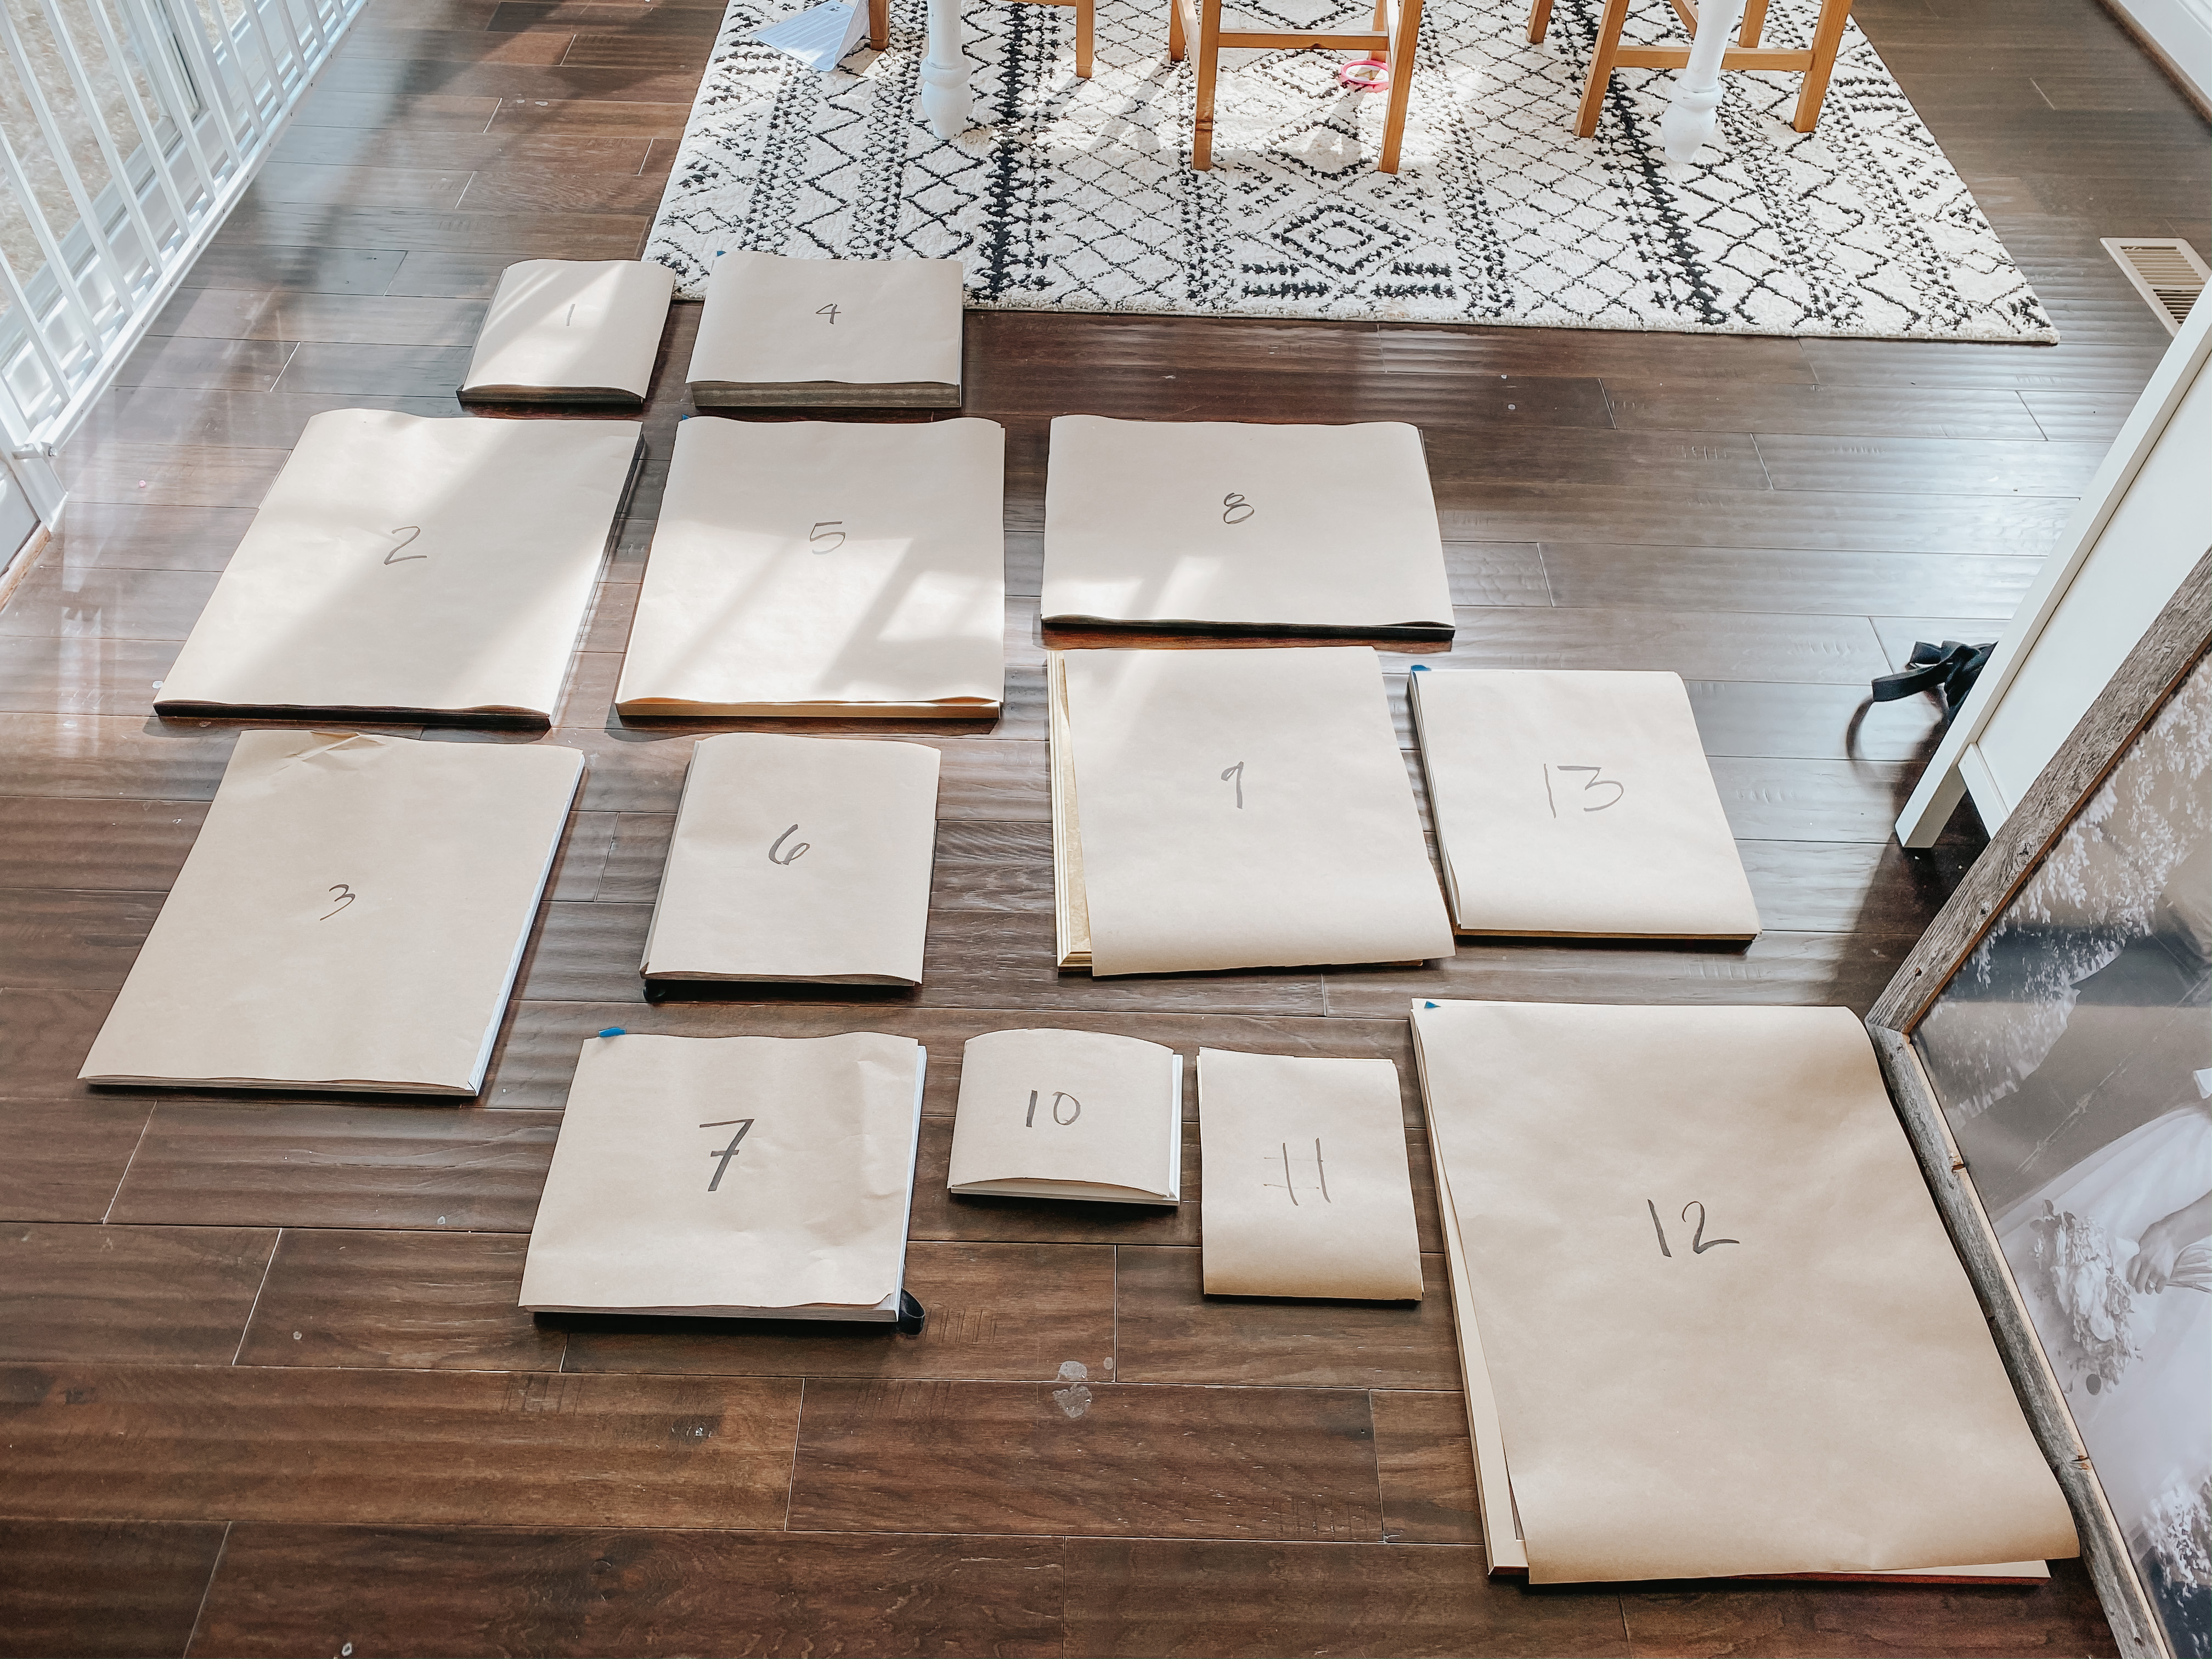
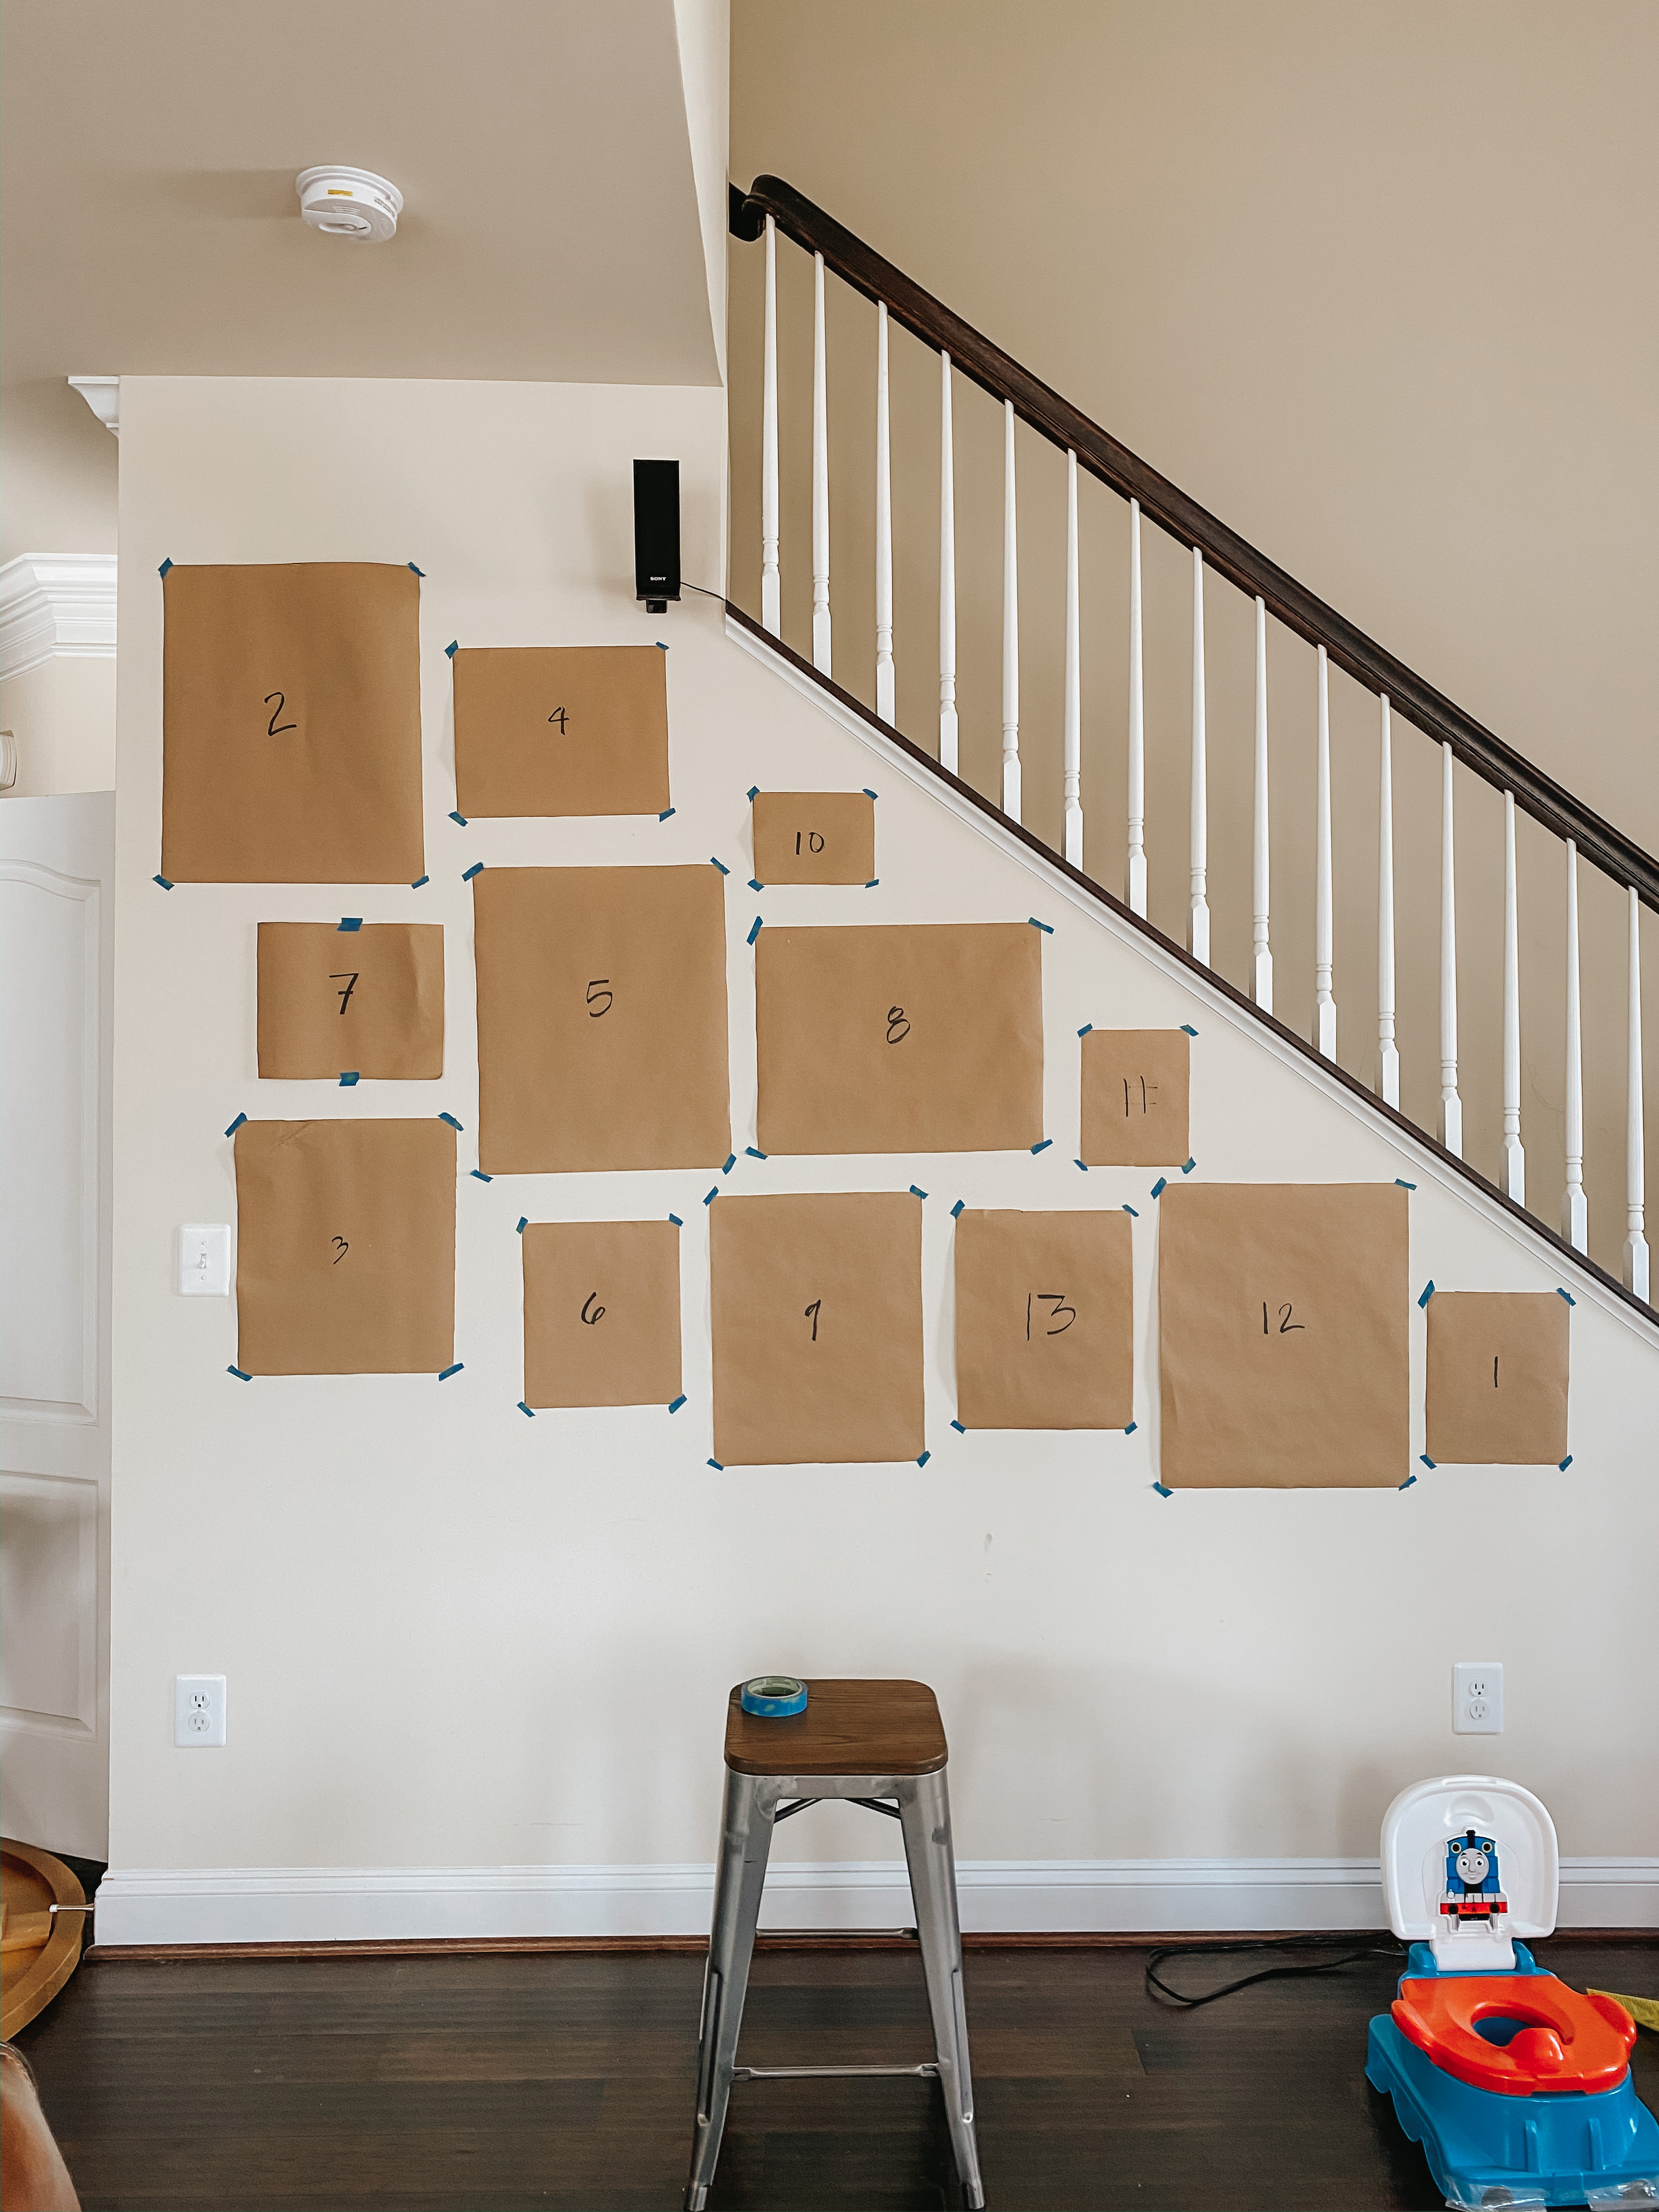
3. Once the frame tracings were cut and numbered, I then replicated the initial configuration on the floor onto the wall.
4. Next, if you’re not completely satisfied with how it looks, switch stuff around! This is where the corresponding number system will come in handy. Perspective is everything. Once I hung up the initial configuration on the floor onto the wall, I was able to see quickly what worked even better now that I was actually working within the exact framework of the stair wall. The photo below shows the numbers out of order; those were the ones that got switched around to a better configuration that met my complete satisfaction. The floor exercise was a great starting point, and so reconfiguring the handful of frames afterwards made it so easy and took no more than 15 minutes.
5. Finally, HANG ‘EM UP! This was probably the more difficult task because many of the frames had different hooks or hanging brackets. It goes without saying to keep handy a level, ruler, and pencil. I’m so glad I only had to do the design portion because I would have been over this within a few minutes.
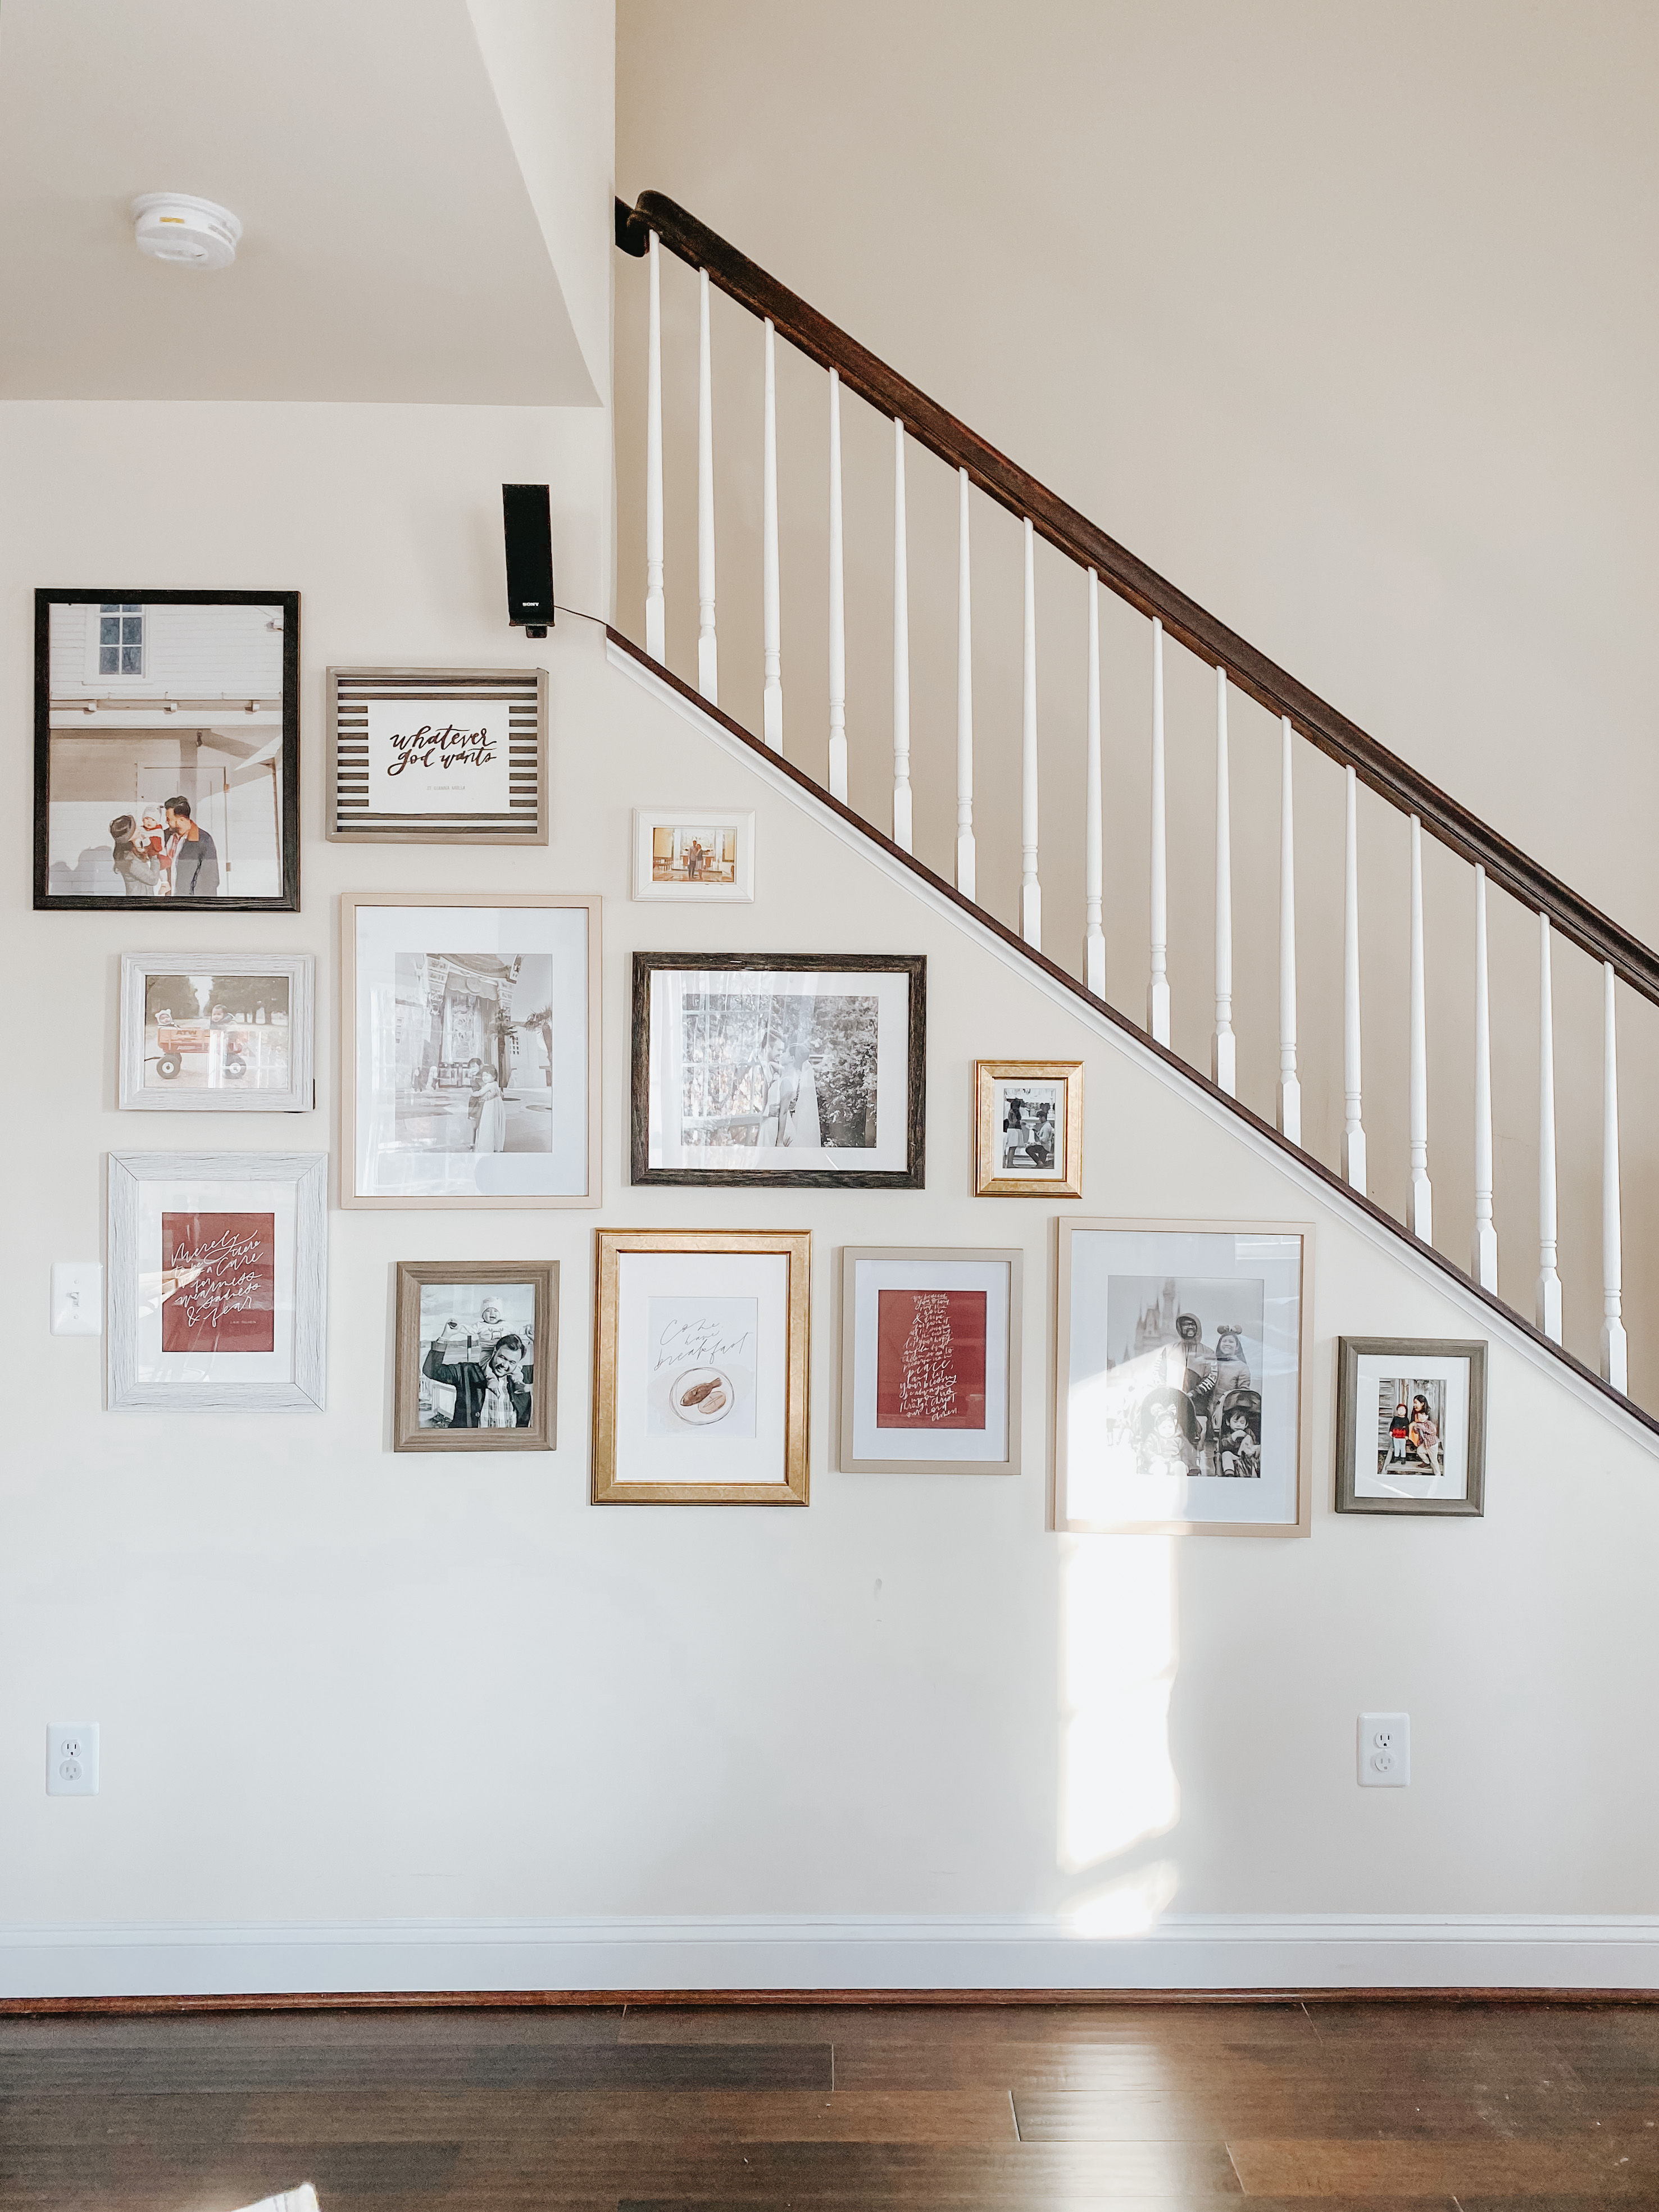
And that was it! Jon finished hanging the frames before we went to bed last night, so I was excited to wake up to see it all again with prime daylight.
I’m laughing at how much we’ve accomplished because on Saturday morning when we woke up, we cleaned and the morning turned into one of those, “oh, I think we’re ready now” – I just didn’t know we were ready for both potty training AND our gallery wall! That makes this all even sweeter.
I couldn’t be more happy with how the wall turned out, and the strategy certainly reduced any feelings of this being an impossible task to accomplish. These framed photographs and art have been leaning against the wall of the morning room for the last two weeks, collecting dust. At least now they’ll collect dust in the right location where these special memories and reminders of faith will always be on display in the heart of our home.
If creating a gallery wall has been challenging for you, I hope you’ll find these tips helpful and will dive right into it. Feel free to leave feedback, and if you were able to benefit from this process, please share! I’d love to see. :)
